
Best Builds for Kodi 2020 and How to Install Them
Do you want to know all about the best Kodi builds for Krypton 17 and Kodi 18 Leia in 2020? Wonder no more, I got you covered. In this review, I’ll take you on a small tour as we review the best builds for Kodi you can use in 2020 and how to install them on your Kodi device.

Best Builds for Kodi in 2020 and How to Install Them
Best Builds for Kodi in 2020 – Content Index
Kodi builds basically are unofficial Kodi versions that come with add-ons and various skins pre-installed on them. This means that if you install such Kodi builds on your PC, Mac, Android, FireStick, you will not have to manually setup Kodi addons.
Most of these Kodi 17 builds also divide the pre-installed add-ons into different categories. But what are the top builds in 2020? Follow this guide and find out.
Best Kodi 17 Krypton Builds Reviewed
Below, you will find a list of popular Kodi builds and what makes them stand out. I’ve also included tutorials on how to install them just in case you want to try them out yourself.
The Beast – Top Kodi Build

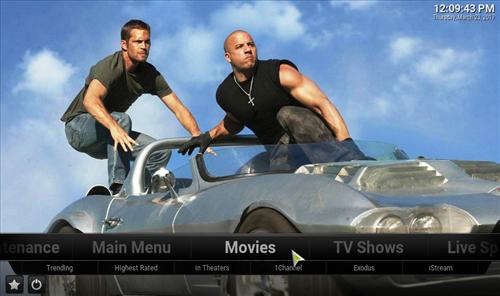
The Beast Build – Best Kodi 17 Krypton Builds
This probably is one of the best known Kodi builds. It contains a huge variety of add-ons. The pre-installed skins are also impressive. Follow these instructions to install The Beast Kodi build.
- First of all, you’ll need to head over to The Beast website and create a username and password. Don’t worry, the process is absolutely free.
- Once you have created your account, use it to log in to The Beast site and verify your account there.
- Next, launch your Kodi app.
- The first thing you need to do after launching Kodi Krypton is clicking on the Settings Icon in the top left corner.
- Then, go to System Settings -> Expert Mode -> Addons.
- Make sure to turn on ‘Unknown Sources.’ Otherwise, you will not be able to install third-party add-ons.
- When the warning box pops up, click ‘Yes’.
- Now go back to the Kodi home screen, and click on the ‘Settings’ icon.
- From here, go to File Manager -> Add Source.
- Select None and then enter the following path without the quotes “https://thebeast1.com/repo/”.
- Name it ‘Beast’ and click ‘OK’.
- From the Kodi home screen, select Add-ons.
- Click on the Package Installer Icon at the top left corner.
- Select ‘Install from Zip File’ -> Beast -> plugin.video.beast.zip.
- Wait for the ‘Beast Wizard Enabled’ notification box.
- Now go to ‘My addons’ -> ‘Program Addons’.
- Choose ‘Beast Wizard‘ and hold the select button.
- Select ‘Settings‘
- Use the email and password you’ve created earlier to sign in.
- You will now be presented with different builds you can install.
- Choose the one you’d like to set up.
- The download and installation process will begin.
- After that is done, your Kodi app will restart.
- Congratulations, The Beast Kodi 17 Build is now installed and ready to use.
Pulse CCM – Best Kodi Build
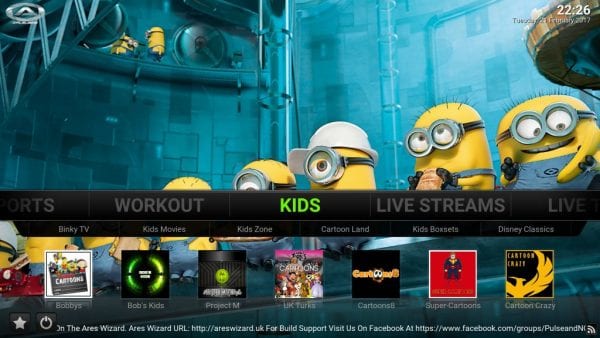
Pulse CCM Build – Best Kodi 17 Krypton Builds
And another highly popular Kodi 17 build. It offers various video add-ons but not many choices when it comes to skins. Let’s kick it off and find out how to get Pulse CCM on Kodi, shall we?
- No doubt, activating Kodi would be a great idea to start the process.
- You’re on the Home Screen now, check the top left of the screen. Hit Settings.
- After that, head over to System Settings. There you’ll find Expert Mode, click on that and navigate straight to Add-ons.
- Third-party add-ons require “Unknown Sources” to be on. Once you activate the feature, you’ll be able to download and install them.
- Return to Home Screen and select Settings once more.
- Now, choose File Manager and click on Add Source.
- You’ll have to pick None first. After that, submit “http://ares-repo.eu/” excluding the quotations.
- We need to give it a name. Let’s go for “Acres”. Done? Hit “Ok”
- Head back to your Home Screen and choose Add-ons.
- Do you see a Package-like icon on the top left of your screen? That’s the Package Installer, click on that.
- Once done, choose the option that says “Install from Zip File” and then select “Acres -> repository.aresproject ->repository.aresproject.zip.
- You’ll be notified when the wizard is activated.
- Select ‘Install from Zip File’ -> Acres
- This one’s easy. Head over to ‘Install from Repo’ -> ‘Program add-ons’ -> ‘Ares Wizard’ and click Install.
- Your installation process will begin.
- Navigate to ‘My addons’ -> ‘Program Addons’.
- Choose “Ares Wizard”
- Now, head over to “Browse Builds”
- Select “Pulse”.
- The installation process will ask for a 4-number pin code to finalize. You can scan the QR code using your phone or use this tool as an alternative.
- Submit the pin you acquired.
- Select ‘Pulse CCM Krypton’ in order to install it.
- When the installation is done, your Kodi will automatically restart.
- And Voila, you can now use Pulse CMM on your Kodi.
Titanium Kodi 17 Build
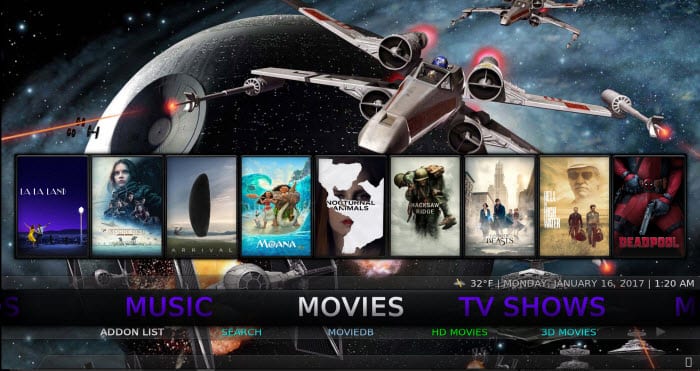
Titanium Build – Best Kodi 17 Krypton Builds
As the name suggests, the Titanium Kodi build has a bit of everything, video add-ons, skins, music add-ons, and even programs. Many popular unofficial add-ons are included as well. If you want to try out Titanium on Kodi yourself, take a look at the steps below.
- Alright, so the Kodi app is up and running.
- Select Settings. You’ll find it on the top left side of your screen.
- After that, go to System Settings -> Expert Mode -> Addons.
- Turning ‘Unknown Sources.’ on is very important to get a hold of third-party add-ons.
- A notification bar will appear. Hit ‘Yes’.
- Again, re-visit Settings once more.
- Choose File Manager -> Add Source.
- Click on None and enter the following “http://infadroid.tk/temp/”, no quotations needed.
- Give a name, ‘INFADROID’ would be perfect. Tap OK.
- Once more, on the Kodi Home Screen, choose ‘Add-ons’.
- Select the Package Installer Icon.
- Choose ‘Install from Zip File’ -> INFADROID > repository.infadroid-x.x.x.zip
- After a few seconds, an ‘Addon Enabled’ warning will pop up.
- That’s where you click on Install from repository > INFADROID boxes > program add-ons > Daily Update Wizard.
- Now it’s time to head over to Install Home > Programs > Daily Update Wizard > Daily Updates official team builds > Titanium Build.
- Your download will start. Wait till it finishes installing and you’re app will restart.
- There you go, you now have Titanium Kodi 17 build.
No Limits Magic Build – Top Kodi 17 Build
No Limits Build – Best Kodi 17 Krypton Builds
The No limits Magic Kodi 17 Build has a variety of third-party video add-ons pre-installed. Its layout is user-friendly as well. If you want to give No Limits Magic Kodi 17 build a try, follow the steps below.
- Activate Kodi.
- Choose Settings.
- Navigate to System Settings -> Expert Mode -> Addons.
- Enable ‘Unknown Sources.’ first for the process to work.
- Hit ‘Yes’ as soon as the notification pops up.
- On your Home Screen, choose Settings again.
- Pick File Manager -> Add Source.
- Choose None and enter the following “http://nolimitsbuilds.com/kodi”. Don’t use quotations.
- Enter‘NoLimits’ as its name and choose ‘OK’.
- Head back to Kodi Homescreen and select Add-ons.
- Tap on the package installer.
- Choose ‘Install from Zip File’ -> NoLimits > plugin.video.nolimitswizard.zip
- An ‘Addon Enabled’ warning will show up.
- Then, on your Home Screen again, select Add-ons -> Program Add-ons
- Press on ‘No Limits Build Wizard’ -> ‘1-No Limits Magic ‘.
- Your Add-on is installing now. Once done, Kodi will restart.
- Finally, enjoy No Limits.
Tomb Raider Kodi 17 Build

Tomb Raider Build – Best Kodi 17 Krypton Builds
This one is relatively old when compared to other Kodi builds on this list. However, it has been well maintained over the years. It also has been updated to function with Kodi 17 Krypton. You can use the installation guide below to set up the Tomb Raider Kodi 17 build on your device.
- Open Kodi.
- Head over to the Settings page
- Click on System Settings -> Expert Mode -> Add-ons.
- Enable ‘Unknown Sources.’ and hit yes when the warning pops up.
- Go to Settings once more.
- Choose File Manager -> Add Source.
- You need to pick None and submit “http://tombraiderbuilds.netne.net/repo/” without using the quotations.
- You can call it ‘TombRaider’ and hit OK.
- Go to ‘System’ -> ‘Settings’ -> ‘Addons’.
- Choose ‘Install from Zip File’ -> TombRaider > repository.infadroid-x.x.x.zip
- An ‘Addon Enabled’ box will appear.
- After that, go back to Kodi’s home screen and choose Add-ons.
- Tap on the Package Installer Icon.
- Click on ‘Install from Zip File’ -> TombRaider -> tomb raider repository zip -> Program addons.
- Add-on will be enabled after you do so.
- Head to ‘My addons’ -> ‘Program Addons’.
- Select Tomb build wizard.
- Click on ‘Tomb Build Wizard’ -> ‘Install Build Now’.
- That’s when the download process begins. Wait for the installation to finalize and your Kodi will restart automatically.
- Enjoy Tom Raider.
The Wookie Build – Top Kodi Build

The Wookie Build – Top Kodi Build
- Installing Kodi Add-ons is very easy. First, you need to access Settings.
- After that, visit the System Settings page and directly head to Expert Mode -> Add-ons.
- ‘Unknown Sources.’ should be on if you wish to install the Add-on.
- Hit ‘Yes’ when the warning sign pops up.
- On Kodi’s home screen, choose ‘Settings’ again.
- Now, click on File Manager -> Add Source.
- Choose None and type “http://wookiespmc.com/wiz/”.
- Let’s call it ‘Wookie Wiz’.
- Select Add-ons on Kodi’s Home Screen.
- Choose the Package Installer Icon.
- Pick ‘Install from Zip file’ -> Wookie Wiz
- Now, hit ‘Click me – Succumb to The Wookie.zip’ start downloading.
- After seeing the Enabled notification, tap on Program Add-ons -> The Wookie -> Install Wookie.
- You’ll find Newlook Wookie – Krypton on the list. Choose that and hit the red button to start the installation.
- Clear your data and click on Continue.
- Your download has started.
- Restart the application.
- The Wookie Build is all yours.
Best Kodi 17 Krypton Builds – Use VPN!
I cannot stress enough how important it is to use a VPN while using Kodi. ISPs have a habit of spying on what you do on a daily basis. So, before you go on to install any unofficial builds, you should establish a VPN connection so that you can browse anonymously.
If you invest in a credible VPN, you should be able to do the following:
- Access Restricted Kodi Add-ons: Although you’ll find limitless Kodi Add-ons, you won’t be able to install most of them due to geo-restrictions. These Add-ons are only available in certain countries and a VPN is able to shift your location and allow you to access these Add-ons wherever you are.
- Improve Internet Speed: Have you wondered why your connection took a sudden drop? That’s because your ISP is tampering with it. It’s what we like to call ISP Throttling. However, if you connect to a VPN server, you’ll be able to circumvent this annoying issue.
- Improve Your Privacy: A good VPN ensures its users that no-logs are collected, that’s one. Another reason to use a VPN is that it encrypts your data and cloaks your IP address so that you can browse without fearing any online threat out there.
- Supported Devices: Most of the VPNs on the market provide us with non-tech-savvy interfaces. That way, whatever your level of comprehension is when it comes to technology, you’ll be able to operate their apps with ease.
Speaking of reputable VPNs, have you tried ExpressVPN? It’s the provider I currently use and let me tell you, it works absolutely well with Kodi. The service offers over the top features including a huge server network of 2000+ servers.
Oh, by the way, if you sign up for ExpressVPN using our website, you’ll get a 49% off for a yearly plan. How cool is that? Not convinced, well then, give the table below a quick look and pick an alternative.
Last Updated Yesterday

- 30-Day Money-back Guarantee
- Unlimited Bandwidth
- Apps For All Your Devices
- 24/7 Live Support


Useful Tips and Tricks for Kodi
Want to know more about Kodi and dig deeper into what it features? Here are some tips from what I’ve seen so far:
Best Builds for Kodi – Wrap Up
Using custom Kodi builds can save you time and effort. However, installing Kodi 17 Krypton or Kodi 18 Leia builds on FireStick, Android, PC, or Mac can also be a bit complicated. Setting up each build differs a little when compared with others. In case you do run into any issues, please drop a comment below. I’ll do my best to help you out.
Related Posts


About The Author
Charles
Streaming gadgets geek. Interested in every little thing there is to know about bypassing regional restrictions. An avid believer in the right to protect online privacy. Charles has also reviewed plenty of VPN service providers and knows how to separate the good apples from the bad ones.

Too bad The Beast website no longer exists.
Disappointed in the above article about these builds. It seems this is just another recycle article and doesn’t really indicate whether the build successfully install and run on Kodi 18. From my experience No Limit Magic works but the others are questionable. Like I said, I’m disappointed that this articles reference Kodi 18 installation, but NOT!
Evan I’m having issues too. Have your problem been resolved if so how? I like no limits but I cant install it on my new Andriod Box t9
No Limits = Trash!
Builds look great. Tried NO LIMITS MAGIC BUILD on my kodi and it’s great. I have PureVPN that has its own addon and repository. Does other VPN providers have them?
i’m trying to get the Titanium Build, it keeps coming up with could not connect to repository. Any thing I can do about this??
Beast Build is working nice in my Kodi but i need a good vpn service i know after some time it will stop work. so can you give me suggestion what is the best vpn for my fire tv, I would appreciate
Take a look at these best VPN for Fire TV.
Can I install multiple builds on kodi/ firetruck?
I don’t think that is possible.
After trying a stupid amount of different builds that kept crashing i thought i would try the BEAST build, after registering “which was a bit confuseing ” which you need to do before installing,
All i can say is what a build, clean crisp easy to use,THE BEAST BUILD is now installed on all mine and friends devices and they all say its the best build they have used.
Proper Buzzing, thanks folks proper top job :D
I have no limit magic and only only one work’s and it’s pain my ass .So why it’s not working I have clue.need help to put something on my stick that’s work’s cuz you got people want charging $45 to download a new thing that’s out there and that’s not right
Every build i try to “Install add-on from zip file” part gives the error message “Failed to download from zip. The dependency on version could not be satisfied. I have updated to the latest version of Kodi 17.6 Krypton and I have completed a fresh start install. Suggestions?
I had to clear my cache was having the same problem
wookie closed down!!
Mr. Roswell –
You are clearly a Kodi expert. Thank you for your fine work.
As for your article on “Best Builds for Kodi 2018,” I have a question about “The Beast” being number one.
“The Beast,” as a condition of service, requires someone to sign into facebook, thereby giving one’s genuine name and other personally identifiable information to “the Beast” (and perhaps to others).
I am wondering why, if “the Beast” supports Kodi, that identity information is required. My first suspicion is that the the Motion Pictures Association and the Cable Industry Association, which want to kill Kodi streaming, are behind “the Beast.” As you know, the cable and movie companies are against Kodi Builds, which can affect their profits. Are you aware that if, to access “The Beast,” we need to give out our personally indentifiable info via facebook. then facebook will lawfully turn over all of our personal information to the cable and movie companies after ANY civil subpoena, thereby opening all of us users of “The Beast” for law suits against us? Why would “The Beast” need our facebook identity information to allow access to “The Beast?,” if that information is not to be used (against us at some future date)? Before recommending “The Beast,” did you look into whether “The Beast,” did you look into whether “The Beast” data will get to the cable and movie companies? Why do you think that “The Beast” Kodi build would demand personal identity info, such as facebook provides? Once you have an answer to that, will you please incorporate your answer into your Kodi-build recommendations? From my perspective, something smells about “The Beast” demanding what amounts to identity information, before allowing its download.
Thank you again for your fine work.
hmm slamious and ares builds not mentioned. I wonder why?
Hi I loaded no limits 17.4 no problem on my firestick but
when i click on movie or tv nothing happens.
reloaded the whole thing and the same again ! any advice please
I added the no limit magic. Once in the addons nothing will open and it’s extremely slow to navigate through. Any suggestions?
Most builds I ve tried dont work on f/stick. Also get “TEXT FILE NOT FORMATTED CORRECTLY”on most wizards build MENU . WHY? ANY FIX?
HELP APPRECIATED.
Did you pick no limits lite? Inwent down a few sections an picked no limits lite. Works great on my fstick. First one i picked didnt work that good
Which build would you suggest for a family with varying degrees of ability to use technology.
After adding the pulse how can i add or find ustvnow?…
Try this guide https://thevpn.guru/install-ustvnow-kodi-17-krypton-addon/
USTV requires you register before it lets you install?
Can’t proceed beyond step 14. Right where I click Daily Updates Wizard the only actionable step from there is install. When I select install I get a message that says installation failed.