
How to Change DNS Settings on Amazon Fire Stick
Fire Stick is a great device to operate when you’re a constant streamer. However, as excellent as it may be, there’s no avoiding the problems that your internet connection might face. Or is there? In this tutorial, you’ll learn how to change your DNS settings on Fire Stick in order to circumvent your ISP’s internet throttling and bypass geo-restrictions. Follow my lead.
How to Change DNS Settings on Fire Stick
How to Manually Configure DNS on Amazon FireStick
Before you change your DNS settings, make sure to write down the current server addresses or settings on a piece of paper. It is very important that you keep these numbers for backup purposes, in case you need to revert to them at any time. If the process of changing DNS seems overwhelming, you can also install a VPN on your Fire Stick instead.
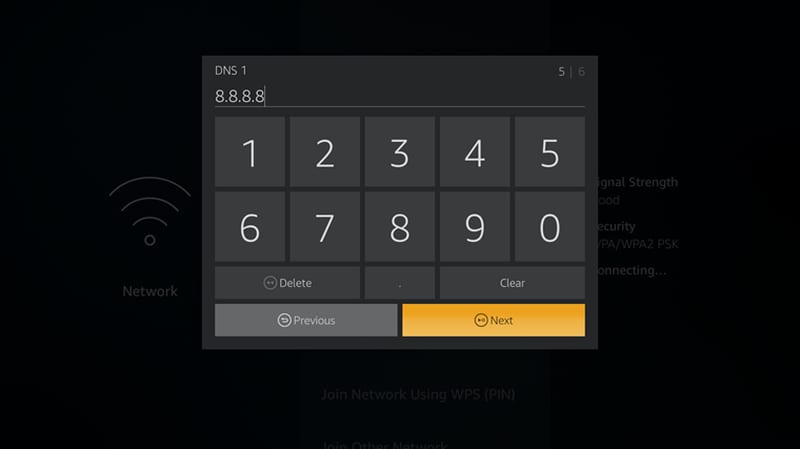
You may use Google’s public DNS. It’s very reliable and free.
- 8.8.8.8
- 8.8.4.4
Now, just like I previously covered Xbox One and PS4‘s DNS configuration, here’s how you change your DNS settings on FireStick:
- Turn on your Fire Stick.
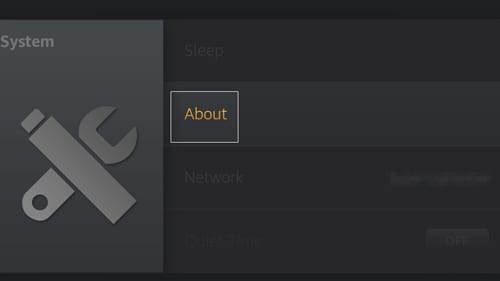
- Head over to Settings -> My Fire TV -> About.
- You’ll see your connection’s details. Note them down.
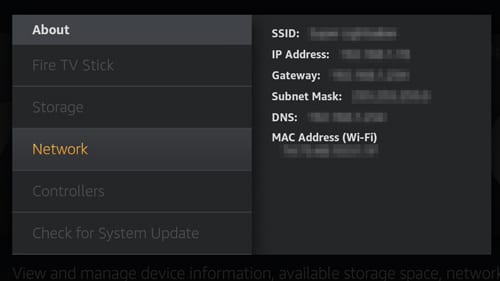
- Now, go to Settings -> Network again.
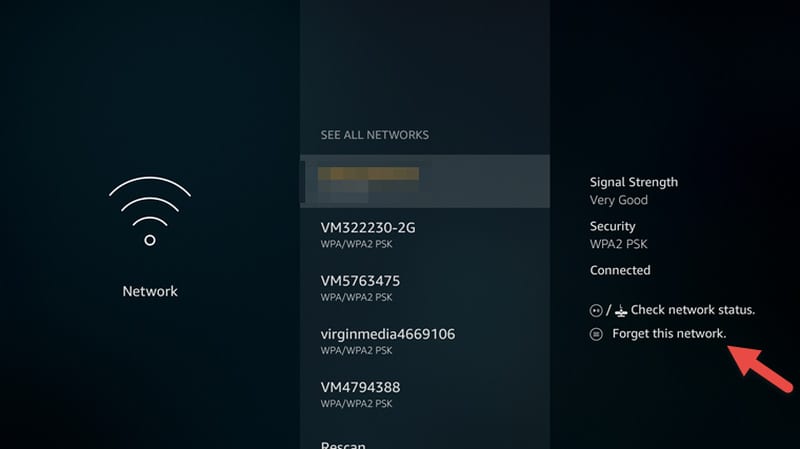
- Click on your wireless connection and hit Forget Network.
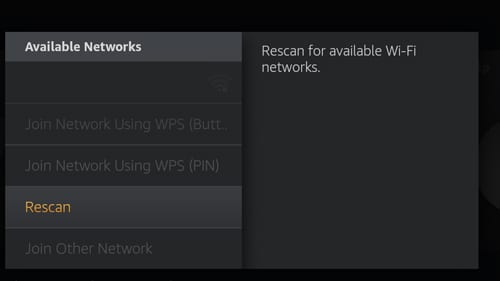
- Rescan for your connection and tap on it.
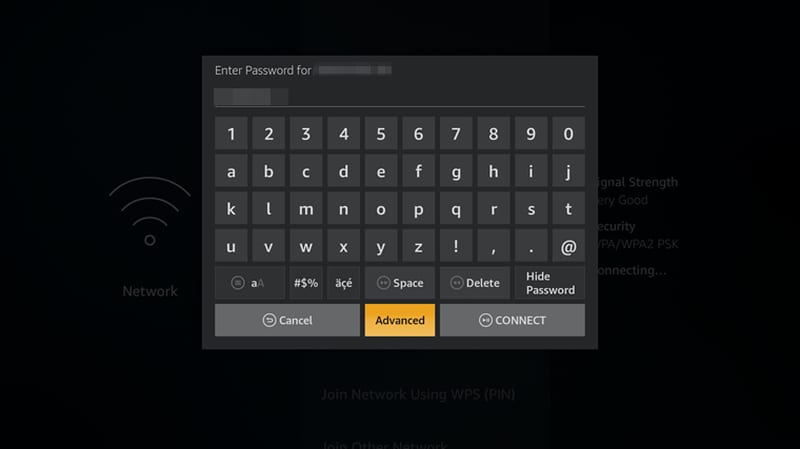
- Enter your Wi-FI password but press on Advanced this time.
- Remember the note you took before, yeah time to type it in:
- IP address
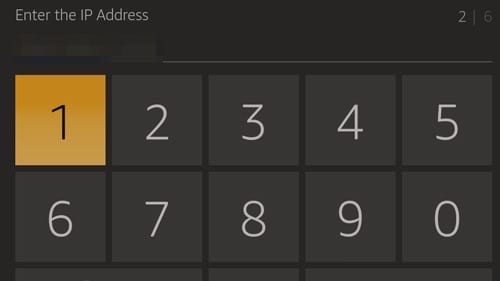
- Gateway

- Subnet Mask (If the last digit was 0, then input 24. If it’s 255, then 32 is your number).

- IP address
- Enter the new Primary and Secondary DNS (You can use Google DNS or OpenDNS)
- You’re done.
Switching DNS Servers – Why?
It gets too frustrating when you can’t tap into the full potential of a device such as Fire Stick. The platform has a lot to offer when it comes to streaming. From Amazon Prime Videos to BBC iPlayer, all can be available provided you live in their respective country of origin. Not only that, but during peak times, it’s next to impossible to watch a video without suffering from buffering issues.
As much as you like to stream content, your ISP’s daily habit is to monitor your activities and throttle your connection. I’m going to talk about this in depth next, keep scrolling.
IMPROVE CONNECTION SPEED
The moment an ISP provides you with an internet connection, you get assigned a server to use automatically. Remember, you’re not the only one using the server. The problem here is that these servers get overloaded and might function slower as time goes by.
Luckily, by changing your DNS settings, you might avoid this issue. Once you tamper with your DNS, you may end up connecting to a server with low ping, which is considered to be very good. That way, you can workaround the slow connection that’s been imposed on you.
Circumvent Geo-restrictions
The essence of Amazon FireStick is that it’s a streaming device. However, what good is a streaming platform if you can’t access the good stuff? Ever wondered why you can’t watch BBC iPlayer outside the UK? Well, in this industry, that’s called regional restrictions.
Don’t fret. You’re here to learn and I’m here to guide you. You can easily circumvent the geo-blocks wherever you are if you make use of a Smart DNS provider. It’s an easy task if you know your way around. There are dozens of providers that offer Smart DNS services like Unlocator, BulletVPN, and ExpressVPN.
Here’s how all this works. Smart DNS tampers with the URLs that showcase where you are at the moment. Once what’s exposing your location is changed, you’ll appear to be browsing elsewhere. That way, you can stream geo-restricted content regardless of where you might physically be.
What About Safety?
Changing your DNS doesn’t encrypt your data or hide your IP address. This means that you’re still on your ISP’s radar no matter what. So, in short, changing your DNS is not safe or in other words, doesn’t get you an extra layer of security.
That’s the job of an internet tool called a VPN. So, if you want to protect yourself while online, then better invest in a Virtual Private Network. On the other hand, I mentioned 2 VPN providers above that include Smart DNS in their services. You can use those if you want the best of both worlds no? In case you don’t know your way around it, here’s how you can install VPN on Fire Stick.
Remember, you can’t use the two services at once. Do you want security and privacy? Then pay up with internet speed. Need to bypass restrictions with an untampered-with connection? Then expose yourself if you’re not that security minded. To guard yourself while using FireStick, check out these best VPNs in the following table.

- Best for streaming and privacy
- High speed servers in 160 VPN locations
- Works for Netflix, BBC iPlayer, Amazon Prime Video, and Hulu
- 24/7/ live chat support
- 3 extra months free on annual plan


- UltraHD streaming
- Free Smart DNS proxy
- Unblocks all major streaming services
- Limited Time 72% Discount


- Unlimited VPN connections
- Over 1000 servers
- Ad-blocking feature available

- User-friendly application
- Exclusive Smart VPN feature
- Standalone Smart DNS subscription available
- Extra security features
- Extensions for Firefox and Chrome
- Split-tunneling available
Smart DNS Service Providers
When you operate with a Smart DNS service, your connection to a streaming website is sent via a proxy server. At the moment, your real location becomes obscured, qualifying you as an internet user where the server you connected to is located. Through that, streaming media services can be tricked.
For example, if you connect to a Smart DNS server in the US, you’ll have full access to American channels. It’s that easy, trust me. Now, here are my top Smart DNS providers:
ExpressVPN
It’s quite possible that ExpressVPN is the fastest VPN out there. This, combined with its spectacular unblocking capabilities, definitely makes it my first choice when it comes to streaming. That’s talking about it’s VPN features. How about MediaStream? This VPN has its own Smart DNS that’s almost capable of unblocking any streaming service desired.
BulletVPN
BulletVPN is an Estonia-based VPN provider that has become a favorite in just a short period of time. It has emerged as an outstanding VPN solution the internet users. But what’s really catchy here is that even though it’s new in the scene, it provides users with Smart DNS. A lot of servers, top unblocking capabilities, and the best security measures – well done BulletVPN.
SurfShark
When you download Surfshark on your FireStick, you’re basically ensuring yourself top-level security and privacy. Not only that, but within the app, you can choose servers located in over 65 countries, making it easy for you to unblock content on your device regardless of your location.
You can also configure Surfshark’s Smart DNS if security is not your priority. That way, you get to access restricted content while maintaining excellent speed rates.
Unlocator
Unlocator is a pure Smart DNS service that only sends DNS traffic related to geolocation to the needed location. No speed will be reduced when connected and it works on several platforms including PC, Mac, Apple TV, Roku, PS4, Xbox One, Phones, and even FireStick.
NordVPN
Finally, we have NordVPN. This service is by far the biggest in terms of server distribution. As NordVPN claims, it has more than 5000 servers scattered across 59 countries.
It unblocks major streaming services like Hulu, Netflix, and Amazon Prime Video, which is what you may be looking for if you’re using Amazon Fire Stick.
Aside from that, you have SmartPlay, NordVPN’s own Smart DNS that can be easily configured on your device. You can follow the setup guides provided on the service’s website.
Configure DNS on FireStick – Summing Up
This is a really simple guide, you guys. All you have to do is follow what I had to say carefully and you’ll witness a whole different FireStick experience. Don’t let your ISP’s throttling ruin your streaming mood. Not even geo-restrictions can cancel your binge-watching plans.
Related Posts


About The Author
Charles
Streaming gadgets geek. Interested in every little thing there is to know about bypassing regional restrictions. An avid believer in the right to protect online privacy. Charles has also reviewed plenty of VPN service providers and knows how to separate the good apples from the bad ones.

Work fine for now and if the ip becomes a problem, i’ll make a static ip for the Fire Tv via router. :3
Thank you!
That’s great to hear!
Hello, thank you for the guide! I’ve a question: when i put the old ip into the wi-fi setting, remains this for ever? Because i’ve the dynamic ip! Thank you so much!
Hi Supanku. Good question. The IP you use in your WiFi setting is not the same as the one you get from your ISP. The former is an internal (private) IP issued by your router while the latter is your external (public) IP issued by your Internet service provider.
Hello
I followed the whole process however when I go onto iplayer or 4od it says the programme is not available in your location. Please can you kindly advise
Thanks so much
Hi Kellie. Have you tried setting your device’s timezone to the UK?
I have been working on this issue for a long time. I have spoken directly with the SMART DNS engineers for hours. They want me to install static routing but my local provider blocks static routing. I am trying to find a way around it. I reset everything as described above. But 8.8.8.8. keeps reinstalling itself. I believe that is part of my problem. How do I avoid that? Thanks very much.
Hello Eric. There are actually two workarounds you could turn to. If you’re using a second-generation FireStick or newer, you could use a VPN on your Fire Stick instead of Smart DNS. Alternatively, you could purchase a secondary router, connect it to your current one, and then block Google DNS on that secondary router.
Thank you. This seems to be working so far. Trying not to get my hopes up. But thank you so much
Hi there. Great to hear you got it going!
Hello,
I’m from the Philippines, and this didn’t work for me. even though I followed the instructions. Any suggestions? thanks
Hi Anne. Where are you getting stuck?
This didn’t work for me, after making the changes it wouldn’t connect to wifi
I’m on a Sky Q router.
Cheers
Hello Guy. It most probably is the case of you entering the wrong IP address for the Gateway part.