
How to Install a VPN on Your NetDuma Router
Have a NetDuma Router? Why not give its functionalities an energy boost by installing a VPN client onto the router? With a VPN, your router will be able to extend the VPN’s security to all connected device, allow any device to access geo-restricted content, and encrypt all of your data regardless of the type/size. Read on to find out how to install a VPN on a NetDuma router, step-by-step.
How to Install a VPN on a NetDuma Router
Why Setup a VPN on Your NetDuma Router
To understand why a VPN will give your router an extra kick, you need to understand what a VPN does.
VPN is short for Virtual Private Network. A VPN is very simply a cybersecurity tool that works on guaranteeing your privacy, security, and anonymity online. VPNs re-route your traffic through a secure and private tunnel using their own servers. Then, they encrypt all of your data so that no one can access it. In other words, no one will be able to steal your information or monitor what it is you’re doing online if you’re using a VPN.
When you install the VPN on your NetDuma router, you’re extending all of those functionalities to all of your connected devices. Any device that uses your internet connection will automatically be covered by the VPN, and it won’t even count towards your allocated device limit. You’ll even be able to utilize the IP spoofing abilities of a VPN to unblock geo-restricted content on all of your devices, even gaming consoles and Smart TVs.
Best VPN for Your NetDuma Router
We suggest using ExpressVPN as your NetDuma VPN. ExpressVPN supports both OpenVPN and L2TP/IPsec protocols and can be easily configured on a multitude of routers. It also specifically support installations on NetDuma routers. You can benefit from its user-friendly privacy policies and 2000+ servers for 30 days before making a true commitment with their 30-day refund policy, no questions asked.
If ExpressVPN isn’t the service provider you want to work with, any one of these top-tier VPN providers would work:


- Best for streaming and privacy
- High speed servers in 160 VPN locations
- Works for Netflix, BBC iPlayer, Amazon Prime Video, and Hulu
- 24/7/ live chat support
- 3 extra months free on annual plan


- UltraHD streaming
- Free Smart DNS proxy
- Unblocks all major streaming services
- Limited Time 72% Discount


- Unlimited VPN connections
- Over 1000 servers
- Ad-blocking feature available

- User-friendly application
- Exclusive Smart VPN feature
- Standalone Smart DNS subscription available
- Extra security features
- Extensions for Firefox and Chrome
- Split-tunneling available
How to Install VPN on NetDumaRouter – Step by Step guide
To install a VPN on your NetDuma router, you need to make sure that the VPN you’re using supports OpenVPN protocols. In this guide, I’ll be working with ExpressVPN and showing you how to install it on a NetDuma R1 router (v 1.03.6g). If you’re working with a different VPN or a different NetDuma model, this guide can still show you the process you need to take:
Download VPN Configuration Files
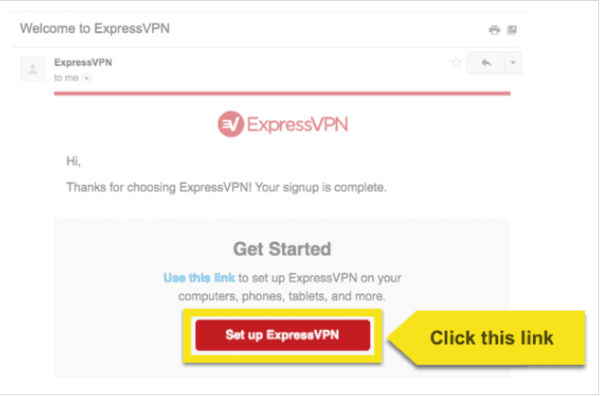
- Go to the welcome email you received when you signed up with the VPN. click on the link in the email to go to your account.
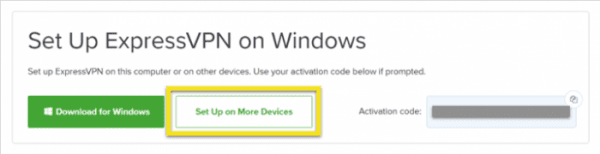
- Sign in and click on Set Up On More Devices.
- Click on Manual Config to the left of the screen. Select the OpenVPN tab on the right. Here’s you’ll see your username, password, and a list of the OpenVPN configuration files.
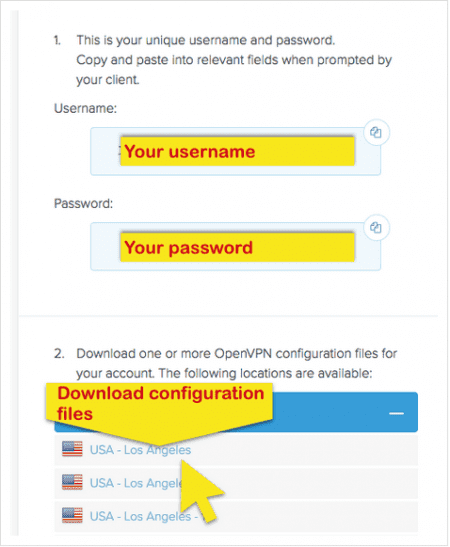
- Save this information (choose a server to connect to and save its address.)
- Open the OpenVPN file using a text editor. Notepad will work.
Configure NetDuma Router
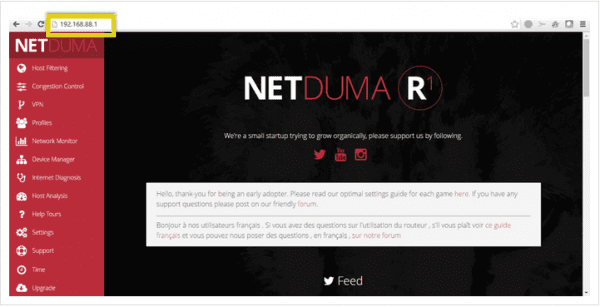
- Log into your NetDuma router. You can do that by entering the router IP (usually 192.168.88.1) into your browser’s address bar.
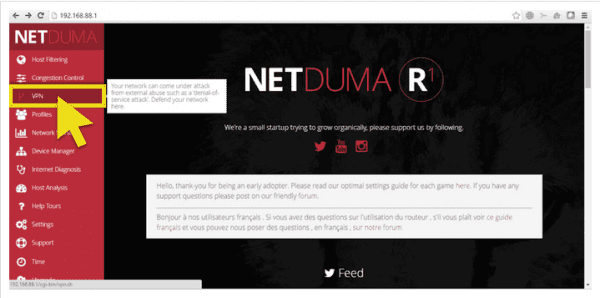
- Click on VPN in the control panel.
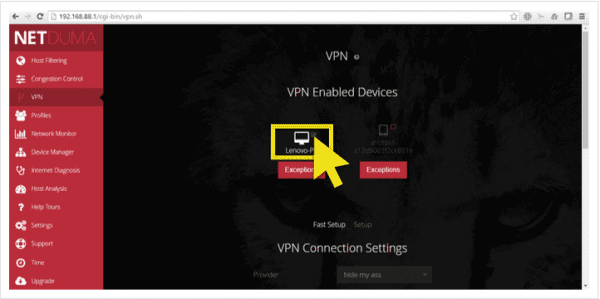
- Select the devices you want to cover by the VPN. Click Setup.
- You’ll be directed to the Advanced VPN Connections Settings.
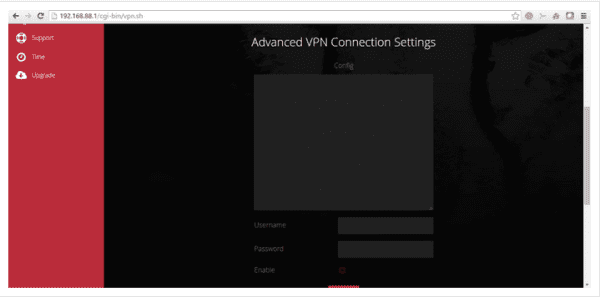
- Go to the OpenVPN configuration file you opened earlier. Copy the entire text.

- Paste the text in the Config box. Remove any extra text (redundancies or extra code after the certificate ends with </ca>).
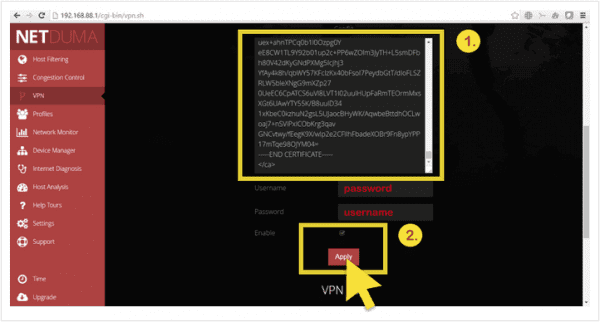
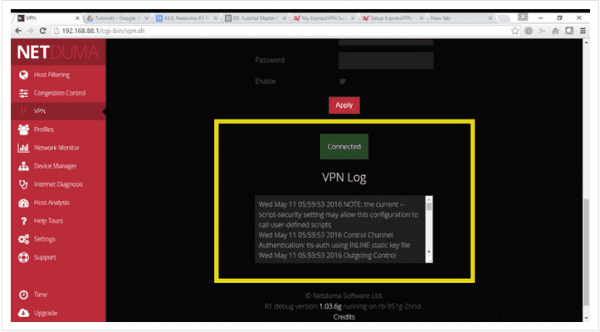
- You’ll see the word “Connected” appear in a green box above the VPN log.
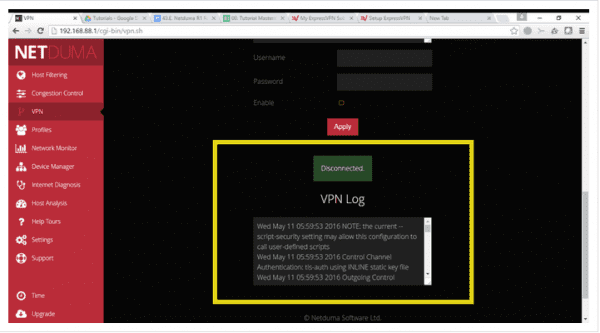
- To disconnect, uncheck Enable and click Apply.
Add or Remove a Device from the VPN
If you want to add or remove a device from the list covered by the VPN, all you have to do is check or uncheck the box next to the device’s name on your router’s control panel. 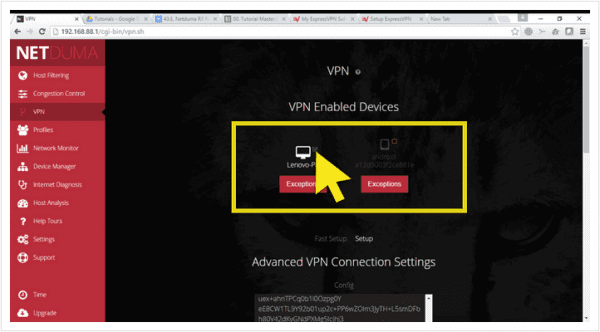
Install a VPN on Your NetDuma Router – Final Thoughts
That’s all you need to know to install a VPN client on your NetDuma router. Make sure to follow the steps closely in order to guarantee a proper installation. If you’re looking to add another kick to your router’s functionality, think about installing DD-WRT or Tomato firmware and get yourself a super-router.
Related Posts


About The Author
Charles
Streaming gadgets geek. Interested in every little thing there is to know about bypassing regional restrictions. An avid believer in the right to protect online privacy. Charles has also reviewed plenty of VPN service providers and knows how to separate the good apples from the bad ones.
