
8 Easy Steps to Protect Your iPhone from Hackers
From checking your social media accounts to making online purchases, we’re trusting our smartphones with a lot of sensitive, private data. That’s why it’s of utmost importance to take extra measure to keep your iPhone or iPad secure. The latest software update for our Apple device users has plenty in store for those that are very much conscious about their privacy. iOS 10.3.1 comes with some nifty little features that enhance your security in more ways than it’s predecessor, iOS 9, is able to. I’m going to show you a number of ways that you can use to take advantage of these features and keep your phone secure. Let’s see how you can protect your iPhone from hackers.
7 Easy Steps to Protect Your iPhone from Hackers
How to Protect iPhone from Hackers – 8 Steps
Let’s start this off with what most regular users are at least known to do.
Step 1: Use VPN
Finally, you can add an extra layer of privacy and security to your iPhone by enabling the VPN feature. By connecting to a VPN server, you are effectively encrypting all of your traffic, making it near impossible for potential eavesdroppers to spy on what you’re doing online.
You can manually configure the VPN connection by heading over to Settings -> General -> VPN. Alternatively, you can download and install a VPN application from the App Store. This makes the whole VPN setup much easier. Keep in mind that you have to sign up with a VPN service provider first. ExpressVPN, in particular, has a VPN app that works perfectly well on any iOS device. Here are the best VPN services for iPhone and iPad as of 2018.


- Best for streaming and privacy
- High speed servers in 160 VPN locations
- Works for Netflix, BBC iPlayer, Amazon Prime Video, and Hulu
- 24/7/ live chat support
- 3 extra months free on annual plan


- UltraHD streaming
- Free Smart DNS proxy
- Unblocks all major streaming services
- Limited Time 72% Discount


- Unlimited VPN connections
- Over 1000 servers
- Ad-blocking feature available

- User-friendly application
- Exclusive Smart VPN feature
- Standalone Smart DNS subscription available
- Extra security features
- Extensions for Firefox and Chrome
- Split-tunneling available
Step 2: Encrypt Your iPhone
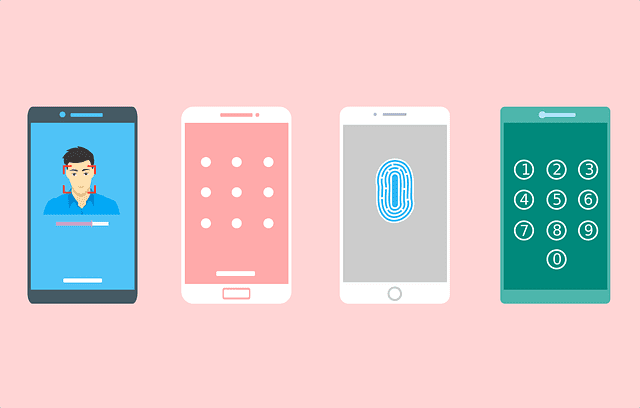
The most basic measure you can take to protect all the details you have stored in your iPhone would be to encrypt it using either your fingerprint, or a password. You can do this by heading over to Settings, Touch ID then Passcode and setting up whichever security measure you feel would be the best fit.
Here are a few tips you can rely on:
- Set your iPhone to lock itself automatically if it’s idle for between 30 seconds to 5 minutes but don’t set it to Never.
- For your password, go for Custom Alphanumeric Code or Custom Numeric Code, forget about the 4-Digit Numeric Code
- Activate Erase Data for your phone to be able to automatically delete everything after 10 failed attempts at your passcode.
- Use iTunes to backup your device rather than iCloud since iTunes has your backup encrypted.
- Use Touch ID for unlocking your iPhone only when dealing with Apple Pay, App Store, iTunes or other apps.
Step 3: Use 2-factor authentication
It’s important to have your Apple ID well secured to prevent it from being easily bypassed by hackers and spammers. You can do that on the Apple.com website.
- Make sure you require a password for additional purchases done on your iOS and Mac devices as well.
Step 4: Enable Find My iPhone
In case your device ever gets stolen, the Find My iPhone feature under Settings, iCloud can save you a lot of frustration when trying to retrieve it. From your Settings, enable Send Last Location so that when the battery is critically low, it sends its last location to Apple.
Step 5: Limit Information Displayed on Lock Screen
iOS 10 allows such a huge array of information to get displayed on your homescreen. This can be dangerous if your phone happens to fall into the wrong hands. The amount of information displayed can be controlled by heading over to Settings, Touch ID & Passcode and disabling whichever app you don’t think has info that is really worth displaying at a glance.
- The first step would be to obviously remove Home Control from your lockscreen.
- As you decide which app’s notifications to display, Previews for your messaging and email apps should be at the top of your list so that the texts don’t appear on the screen.
- If you can’t find what you need to customize in the Settings tab, head back to the home screen, swipe down, then right to have a look at your widgets. Scroll down until you find the Edit button which you’ll use to customize that screen.
- Lastly, another good measure would be to disable Raise to Wake so that people aren’t able to just lift up your phone and view all your personal information.
Step 6: Prevent Third-Parties From Tracking You
Third party apps may track you or your use through ads and this might be dangerous if some of them have malicious intentions. To disable this, go to Settings, then Privacy, then Advertising and enable Limit Ad Tracking. Tap on Reset Advertising Identifier so that no ads are able to track you down.
- Always browse the web in incognito mode. You can do this by setting up Private at the page switch icon on your Safari browser.
- Have a look at the information used by Apple to push ads to you through View Ad Information.
Step 7: Restrict Access to Data
As a safety-resort of last measure, you can set up your phone to delete records of messages after a certain period of time. You can do this by heading to Settings, Messages, then Keep Messages and set them up to expire after about 30 days. The same can apply for your Audio messages; deleting them two minutes after listening won’t do you any damage.
Step 8: Take Control Of Your Location Information
Apple allows you to manage your location information through the Location Services setting under Privacy. You can tell apps never to track you, or to only do so when you’re using the app. Allowing them to track you in the background could be dangerous, so we’d advise you not to do it.
- From Location Services, Disable Frequent Locations under System Services to prevent your phone from providing location-related information in apps.
- Your Privacy screen also allows you to limit the types of information you’re sharing with your apps.
How to Protect your iPhone from Hackers – Conclusion
Apple is well known for making their user’s security at the top of their priorities whenever they’re building up a new version of their software for an update. iOS 10.3.1 continues to carry and demonstrate this well respected legacy by apple, and with every release, the security features just keep getting better and better. If you’re an iPhone owner who is still stuck on their previous iOS version, you just finished reading a whole bunch of reasons why iOS 10.3.1 would do you so much better.
Related Posts


About The Author
Charles
Streaming gadgets geek. Interested in every little thing there is to know about bypassing regional restrictions. An avid believer in the right to protect online privacy. Charles has also reviewed plenty of VPN service providers and knows how to separate the good apples from the bad ones.

I got a text saying something like don’t tell but I’ve been getting job text alerts and thought it was one but I think it could be something for hackers to get into my iPhone. So how can I find out?