
How to Change DNS Settings on Buffalo Routers
Buffalo routers are known to be a fast wireless solution for streaming and gaming. However, as good as they may be, they can’t operate well if the DNS server they’re using crashes. Therefore, if anything happens, you need to find yourself an alternative otherwise it could be frustrating. Don’t worry, we have a solution. Here’s how you can configure DNS Settings on Buffalo Routers.
How to Change DNS Settings on Buffalo Routers
Domain Name System?
Your ISP controls most of what your internet operates on, including the DNS servers. Your provider automatically assigns you a couple of settings the moment you say yes to their service. DNS is where the words you enter in a browser gets translated. You see, our computers don’t use the same words as we do. When we enter a website’s name, the letters are sent to a DNS server to get shifted into digits or IP addresses. Now that’s what PCs use to communicate with each other. When they’re finally sent back to the browser, you desired page should load instantly.
Have you ever compared ISPs with your friends? Which one is better? We don’t know until we focus on the service. My ISP can be unreliable at sometimes due to sudden dropping in the internet speed. That’s not good at all considering the fact that I’m a constant gamer. That’s why I change my DNS server every once in a while. You should too. You can literally change DNS on any device if you set your mind to it. For now, here are some free DNS servers that you can change to:
- Google
- 8.8.8.8
- 8.8.4.4
- OpenDNS:
- 208.67.222.222
- 208.67.220.220
Step 1: How to Obtain Buffalo’s IP Address
Before we begin, we need to access your router’s settings. We can’t do so unless we obtain the router’s IP address. Here’s what you need to do on both Mac and Windows PC:
Get Buffalo Router’s IP on MacOS
Getting your router’s IP on Mac requires no technical skills. Just of a few steps and you’ll be changing DNS like that. Here we go:
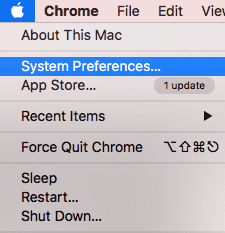
- On your Mac, choose the Apple Sign on the top left corner of your screen.
- Pick System Preferences.
- Select Network.
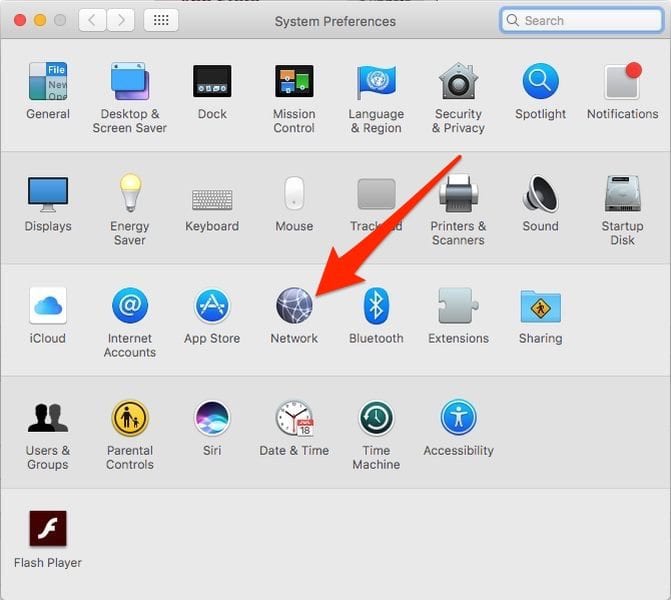
- Click on Advanced.

- Click on TCP/IP. Your IP address is next to “Router”.

Obtain Router’s IP on Windows PC
This one is a little harder than the one before. It needs some typing and skills, but I’m here to walk you through it.
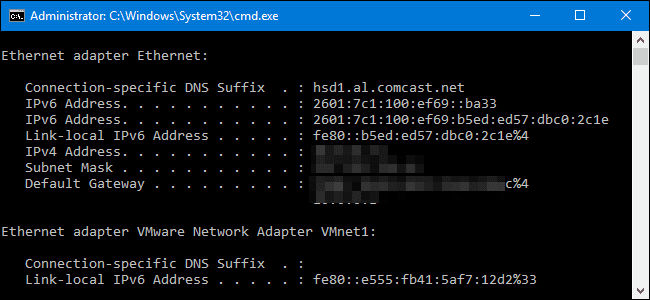
- On your laptop, go to “Command Prompt”.
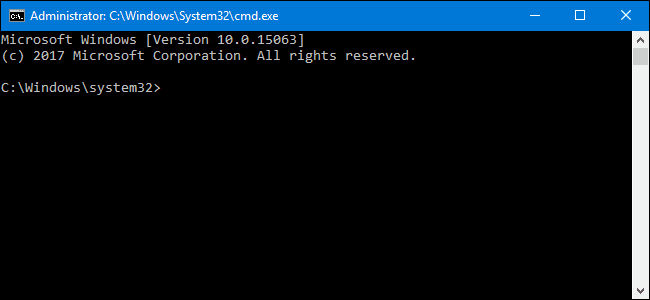
- Type “ipconfig”, excluding the quotations.
- You’ll notice that a lot of info is being presented on the black screen.
- Your Router’s IP is next to Default Gateway.
How to Change DNS Settings on Buffalo Routers
After getting your IP address, the process becomes much easier. Follow my lead:
- First, paste the router’s IP address in the URL bar in your browser.
- This will take you to the login page. Sign in with your credentials.
- After that, you’ll get to your router’s main page, click advanced.
- Now, select WAN config on the left.
- You can change DNS settings now. Please write down your old ones in case you want to revert back to them later on.
- As you can see, I used OpenDNS in the process. Once done, hit apply.

- You’ve successfully changed DNS Settings on Buffalo Router.
Why Change DNS Settings on Buffalo Router?
There are a lot of reasons to change DNS settings on your router. Have you ever noticed a drop in your internet connection? You might not know this, but it’s possible that your ISP is unable to maintain a well functioning server. Anything can affect the server including getting overloaded with internet users. I don’t know about you, but I already changed my servers and I’m happy with the results. Take a look at the benefits below and what you can gain from changing DNS servers.
Enhance Your Internet Speed
One of the main reasons a certain server gets overcrowded is due to the fact that only one ISP provided internet to the country. Think about it, you are accessing the internet on the same server as anyone in the country? How overloaded can it be? Even the pages you’re used to visiting may take some time to load at this rate. To avoid such issue, you can always change your DNS server. You already know how to do so as I showed you above.
If you were lucky enough to tap into a server where you get to avoid ping time. That way, you’ll be able to browse the internet with some decent speeds. Moreover, you won’t suffer from that frustrating buffering message ever again.
Bypass Regional Restrictions
Streaming is the new entertainment methods for people who use the internet. However, streaming services have rules and no one should be able to break them. For example, every channel doesn’t allow access to viewers residing outside its region. If you live abroad, you’ll receive an error message that won’t go away unless you invest in a special service called Smart DNS Proxy. This kind of service reroutes the internet traffic that’s responsible for showcasing your current location. Once done, you can access geo-restricted channels from all around the world with ease.
It’s quite simple actually. All you have to do is follow the setup guides that are presented on any service’s website. Below you’ll find the best Smart DNS services out there. Check out their specs and choose wisely.
ExpressVPN
First, we have ExpressVPN. The number one VPN in the industry. Before we jump to the conclusion that this one is a VPN, not a DNS Proxy, you need to keep on reading. When we talk about its VPN service, this one supports protocols such as OpenVPN with TCP and UDP, SSTP, L2TP/IPsec, PPTP with 256-bit AES encryption. If you’re a security freak, you found your companion.
On the other hand, we have MediaStreamer. This is ExpressVPN’s own Smart DNS Proxy. With this, you won’t lose speed, since Smart DNS doesn’t encrypt your internet traffic. You can stream dozens of channels with MediaStreamer just by altering a few settings. They do offer a 30-day money back guarantee in case you change your mind.
BulletVPN
BulletVPN is still new so don’t judge that fast. The service has a great server network that includes servers in 55-countries around the world.
However, we’re talking about DNS Proxy here, and this provider has an excellent one. You can always switch between Smart DNS and VPN if you’re looking for privacy. Remember, you can’t use both together.
BulletVPN offers protocols such as PPTP, L2TP, OpenVPN, IKEv1, and IKEv2. It’s a great VPN provider with a Smart DNS service. Give it a try if you want.
Surfshark
Another perfect option for Buffalo routers is Surfshark. With a server network of 2000+ in 65 countries, we can assume that you’ll be getting all the restricted content you’re looking for.
Now, it might be a great VPN, but we’re here to state what its Smart DNS is capable of. With Surfshark, you can easily configure its Smart DNS on your router and access any content they support on any connected device.
Unlocator
Unlocator is the last one on our list but tops the charts among rivals as it unblocks more than 233 channels across the globe. The service is more than easy to use and can be set up on your Buffalo Router within seconds. Just visit their official website, sign up for their free 7-day trial, and stream the best channels out there with ease.
How Safe is Changing Your DNS Settings on Buffalo Router?
Well, the service itself doesn’t add any security value to your connection, which means it’s harmless. Smart DNS Proxy is a service for bypassing regional restrictions and that only. If you’re looking for security, you’ll need to install a VPN on your Buffalo Router.
A VPN rechannels your internet traffic through one of its servers in a chosen country. Your data will pass through an encrypted tunnel, which protects it all the way from hackers and cybercriminals. Not to mention that your IP address will be hidden as you take on a new one. This avoids any spying attempt from your ISP and even government. That said, if you truly care about staying safe and anonymous when you access the web, here are some of the top VPNs for Buffalo Routers.

- Best for streaming and privacy
- High speed servers in 160 VPN locations
- Works for Netflix, BBC iPlayer, Amazon Prime Video, and Hulu
- 24/7/ live chat support
- 3 extra months free on annual plan


- UltraHD streaming
- Free Smart DNS proxy
- Unblocks all major streaming services
- Limited Time 72% Discount


- Unlimited VPN connections
- Over 1000 servers
- Ad-blocking feature available

- User-friendly application
- Exclusive Smart VPN feature
- Standalone Smart DNS subscription available
- Extra security features
- Extensions for Firefox and Chrome
- Split-tunneling available
How to Change DNS Settings on Buffalo Routers – Final Words
An additional level of security is always a good idea when you’re sending sensitive information via email. However, that’s not the case every time we approach the internet. Some of us are gamers while others are streamers. We all need good internet speed to enjoy a better internet experience. That’s why changing DNS Settings on Buffalo Routers can be the perfect way to do so. Enjoy.
Related Posts


About The Author
Mark
Tech-guru, avid streamer, and an expert in all kinds of devices and how to set them up. Mark has written numerous guides on how to set up a VPN and proxies on all kinds of devices.
