
How to Change DNS Settings on Any Device
Sometimes, when you access certain web pages, you notice that they’re down. However, you may not know this, but they are actually still right there. It’s simply because your computer has lost the route or the DNS server you’re operating on is not functional. In this guide, I’m going to give general procedures that can be applied to your Windows, Mac, iOS, Android, and many more. Bare with me a little and learn how to change your DNS settings on any platform.

How to Change DNS Settings on Any Device
DNS – In General
The IP addresses that are used by your DNS servers are automatically assigned by your IS once you subscribe for their service. This is done through the Dynamic Host Configuration Protocol (DHCP). Short for Domain Server Name, DNS is like a translation book that shifts the URLs you enter in your browser into their respective IP addresses. Once they reach the server, they are sent back to your device where the page you entered can be loaded. In other words, DNS is mostly the language of browsing.
Let me give you an example. This is fun to do by the way. Go to your browser and enter the following: (172.217.24.238). This is the IP address translated from the URL you all know (www.google.com). When you type in the address and hit enter, the page will instantly redirect you to the Google home page. See, I told you it’s fun.
Before we begin, here are the top free DNS servers that you should keep in mind (Remember to write down your old ones in case you need to revert back to them in the future):
- Google
- 8.8.8.8
- 8.8.4.4
- OpenDNS:
- 208.67.222.222
- 208.67.220.220
How to Change the DNS Settings on Your Device
By default, your computer probably reaches out to a DNS server controlled by your internet service provider. Nevertheless, these servers are not always reliable to operate on and that may end up affecting your browsing experience. Therefore, changing your DNS server is the only way to circumvent this issue you have no control over. So, without further ado, here’s how you can change your DNS settings on major internet devices:
Android
Android devices might get a bit tricky when trying to change their DNS. This is not because it’s hard to do so, but it’s the fact that there are two network types to work with. One being Wi-Fi and the other is its mobile network (3G/4G). Don’t fret, I got you covered in both cases. So, check out how to switch DNS on Android here:
- Wi-FI
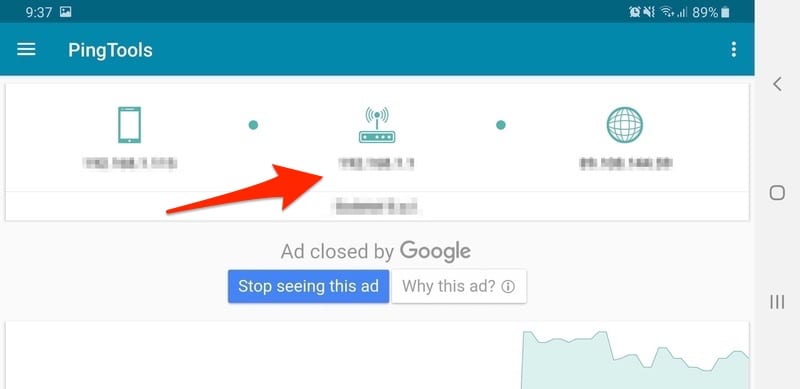
- First, if you know your router’s IP then that’s good. If not, then download the Ping Tool App.
- Note down your router’s info.
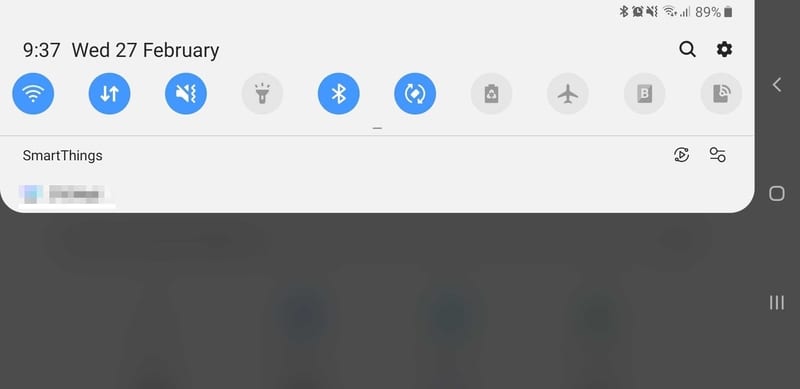
- Go to Quick Settings your Android.
- Choose Wi-Fi.
- Hit Network.
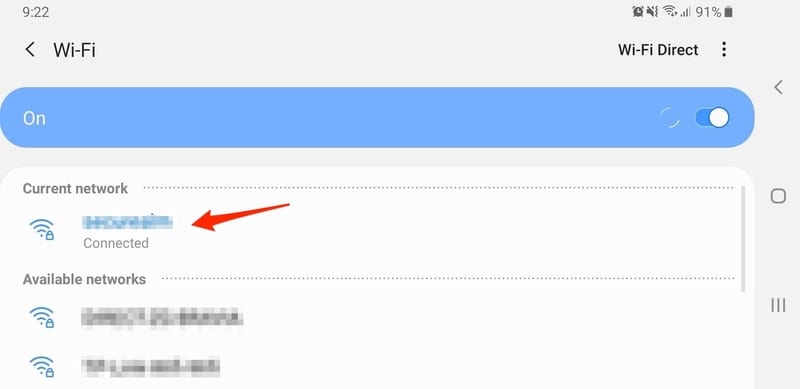
- Keep scrolling and click on Advanced.
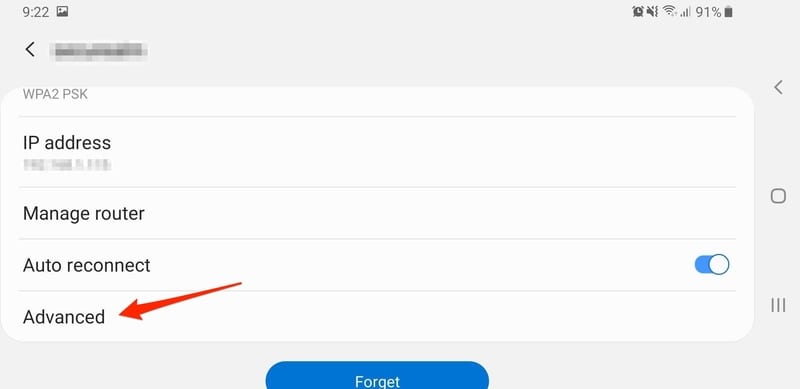
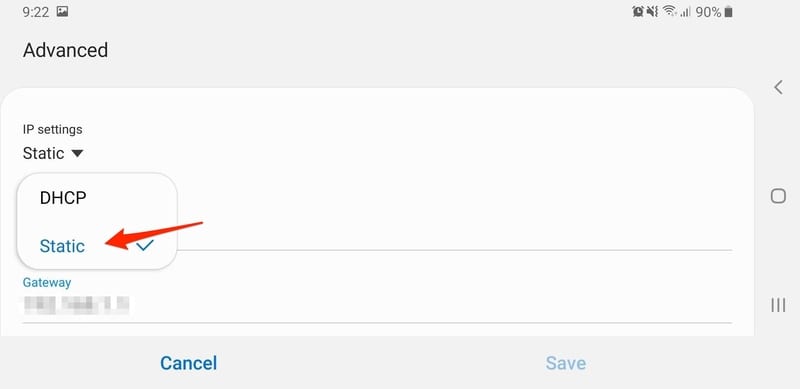
- Switch IP Settings from DHCP to Static.
- Write down your router’s IP address where it’s pointed.
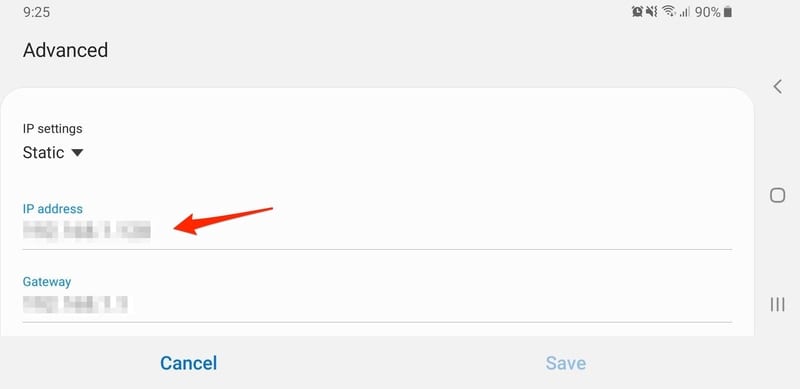
- Go down to DNS Settings.

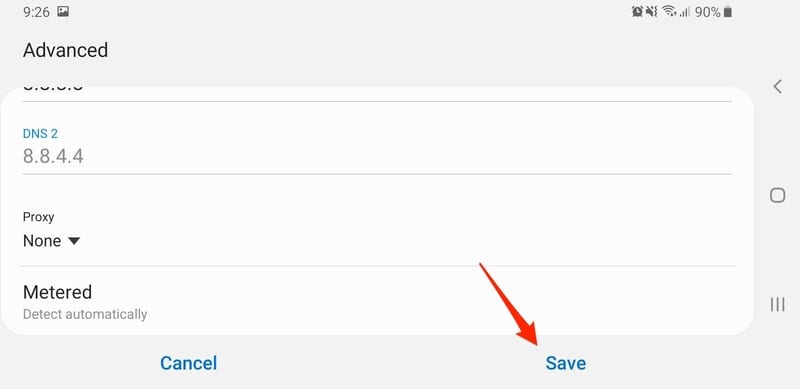
- Change them according to what DNS you want.
- Click Save.
- First, if you know your router’s IP then that’s good. If not, then download the Ping Tool App.
- Mobile Network:
You can either use a certain application like DNset or invest in a Smart VPN service. Using Smart DNS is easy, take a look at how it goes down:
- Sign up for an Unlocator account.
- Go to their page and sign in.
- Head over to the Smart VPN tab.
- Copy the user name and password given. (Note that they’re not the same as your regular credentials).
- Click Settings -> More Settings
- Press Add VPN Network.
- Now, enter the following settings:
- Name: Unlocator
- Type: PPTP
- Server Address: vpn.unlocator.com
- PPP encryption: Enable
- Select Advanced Option. Don’t put anything in DNS.
- Forwarding Rules: 10.11.12.0/24
- Hit Save.
- Select Unlocator VPN connection to connect.
- Log into your Unlocator account and verify that you have 3 green checkmarks.
- Done.
iPhone/iPad
iPhones also use both Wi-Fi and mobile networks. Therefore, I’m going to cover both as well. Take a look below and learn how to configure DNS on your iOS devices:
Wi-Fi:
- Go to Settings.
- Select Wi-Fi.
- Choose your Wi-Fi network and hit on the “i” icon.

- Choose the Configure DNS section.
- Press on Manual.
- Type in the new DNS Addresses.
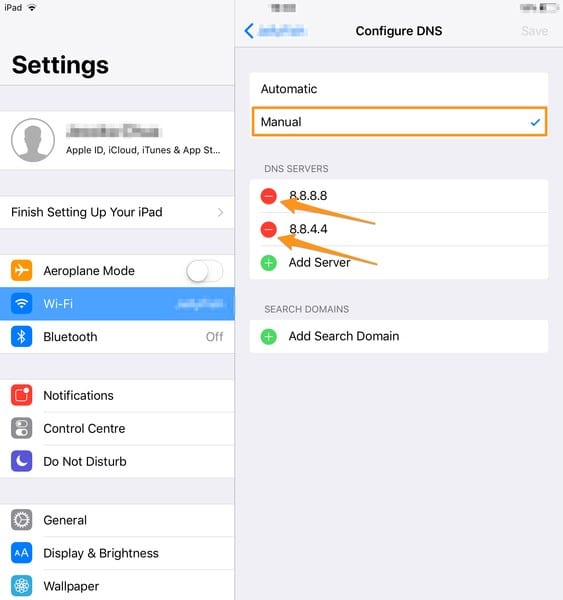
- Go back and you’ll automatically save the changes.
3G/4G:
- Sign up for an Unlocator account.
- Log in.
- Select the Smart VPN tab.
- You will find a username and password for Smart VPN. (Note that they’re not the same as your regular credentials).
- Go to Settings -> General -> Select VPN.
- Hit Add VPN Configuration.
- Once done, choose L2TP and input the following details:
- Description: Unlocator
- Server: vpn.unlocator.com
- Account: Your account email
- RSA SecurID: Off
- Password: Enter your VPN password (The one mentioned in Step 3)
- Secret: smartunlocator
- Encryption Level: Auto
- Send all traffic: Off ( Important!)
- Proxy: Off
Windows
To change your DNS server on Windows, simple steps must be taken. You can find them below:
- Head over to Control Panel -> Network and Internet.
- Click on Network and Sharing Center.
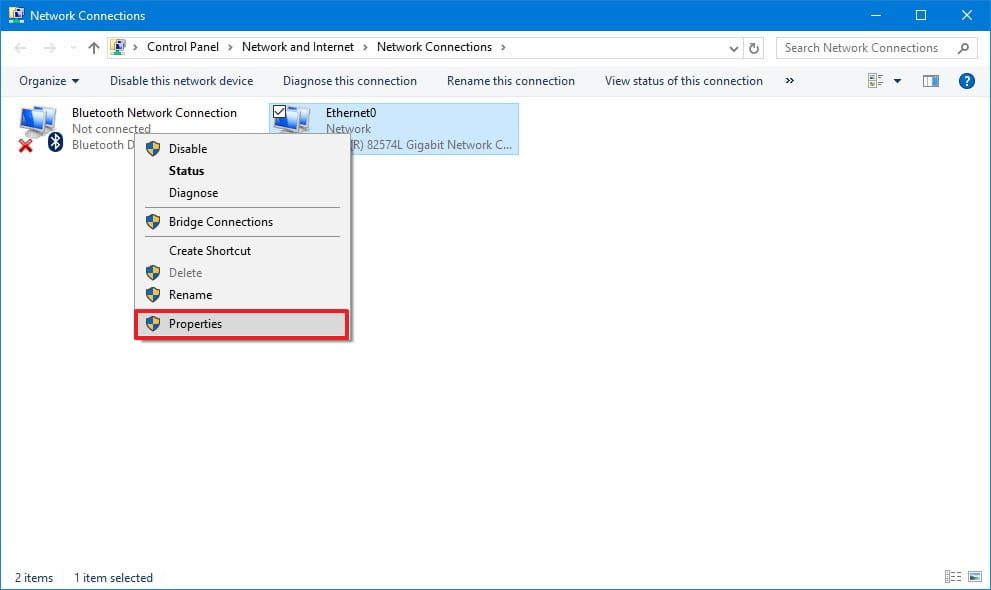
- Select Change Adapter Settings.

- The network interface will appear. Right-click on it and Select Properties.
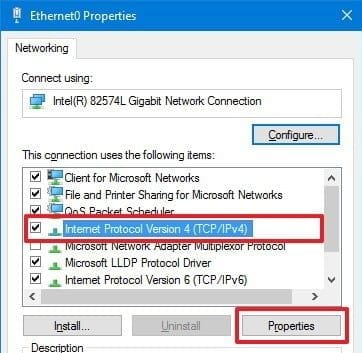
- Choose Internet Protocol Version 4 (TCP/IPv4).
- Now, click Properties.
- Click on Use the following DNS server addresses option.
- Insert your alternate DNS server addresses. (Try the ones I listed above)
- Tap OK
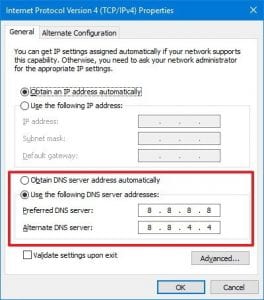 .
. - Click Close to apply the new DNS settings to the adapter.
- You’ve successfully changed your DNS on Windows.
MacOS
The Mac method is very easy. Therefore, if you want to alter your DNS settings on your Macintosh, here’s what you need to do:
- Choose “System Preferences” from the Apple menu.
- Select Network.
- Choose your network interface (Wi-Fi or Ethernet).
- Tap on “Advanced”

- Now, choose the “DNS” tab.
- In order to add a new DNS server, click on the “+” button.
- To edit an already existing one, click twice on the DNS IP.
- To delete a DNS server, press on it and hit delete.
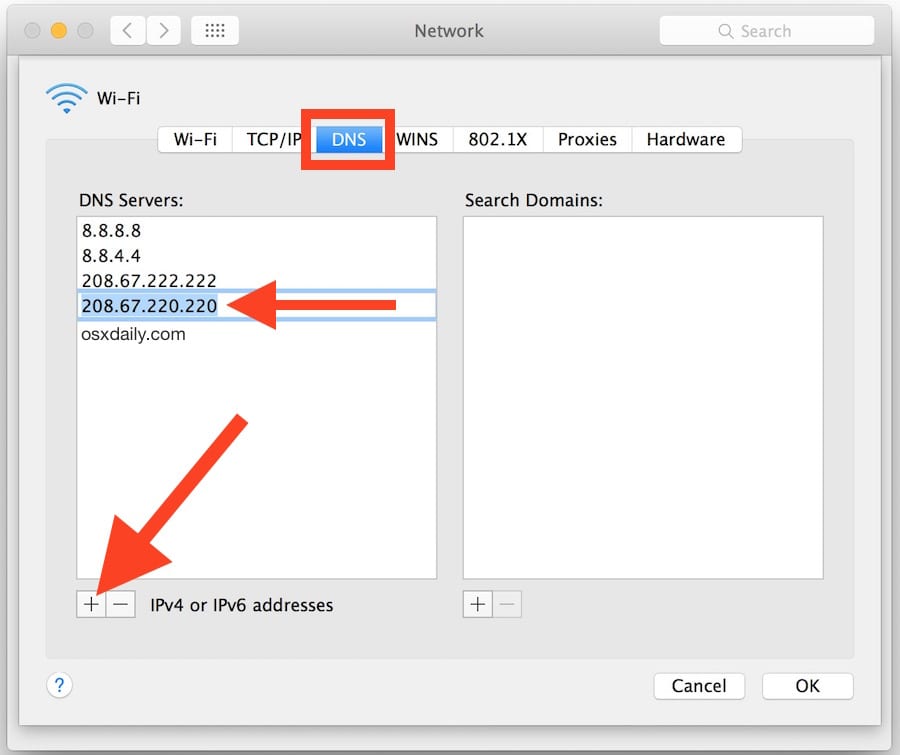
- Once done, select the “OK” button.
- Tap on “Apply” for the changes to take effect.
How to Change DNS Settings on Gaming Consoles
Gaming consoles are also victims when it comes to latencies and lags. You might notice that the download speed you’re getting on your PS4 and Xbox One is not the same as the one on your laptop or mobile. Online games suffer the most from this issue as it ruins their gaming experience. Luckily, switching DNS servers can help circumvent that with ease. So, without further ado, here’s how you alter your DNS settings on the following gaming consoles.
PlayStation 4
The PS4 is Sony’s most attractively designed piece of hardware. Ever since its release, the platform became a living room hub for gamers around the world. It comes with the best graphics you can find out there as well as the top games in the world. However, as most of the games are linked to online multiplayer showdowns, your internet might fail you once you hit the connect button.
To avoid this, you need to change your DNS settings on PS4. It’s not hard at all. Just follow the guide and you’ll be “Finishing Him” in no time.
Xbox One
Xbox One is another fan favorite when it comes to top gaming. it’s the eighth generation home video game consoles developed by Microsoft. Although its main focus is gaming, the console also allows streaming applications like Netflix, Hulu, and so many more. Nonetheless, online games and streaming services are worthless if you have a slow connection at home.
Don’t you get tired of having your video buffer every 1 minute or so? Let’s not forget the online game lagging you might suffer due to a sudden drop in your internet connection. Well, there’s a solution for that. All you have to do is configure your DNS server on Xbox One and your speed will elevate the moment you hit save.
How to Configure DNS on Streaming Devices
Streaming devices have become very popular among couch potatoes nowadays. You can literally spend a whole weekend binge-watching top shows and movies without even hitting 2% of their libraries. With a small monthly fee, you get a streaming experience worth a thousand pirated website bombarding you with ads and malware.
These services depend on having a decent internet connection to operate at their best. If your connection is bad, then you’ll be watching the buffering sign instead of your video. Don’t worry. We’ll work around your issue once you know your way around. Here’s how you can change DNS on the following streaming devices:
Amazon Fire Stick
The FireStick is a great platform to have on your big screen TV. It allows you to stream content ranging from Amazon itself to services like Netflix, HBO, Hulu, and a lot more. If you’re an Amazon subscriber, then you get all the originals and releases per month just like Netflix’s schedule. However, the others need a valid subscription to their own service if you’re looking to use them on FireStick.
The device itself is super speedy. You can navigate through the menus delightfully and once you click on a video, it almost loads instantly. Or does it? Well, this also depends on the speed of your internet connection, which might be down at some times. Using your ISP’s servers might lower your chances of having a good movie night. Luckily, you can configure DNS settings on FireStick and obtain better speeds outside your ISP’s range of servers. This is quite useful if you’re a constant streamer who’s fed up with latencies.
Apple TV
When you see Apple, all you think about is classiness and prestige. Well, you’re not wrong about that when we’re talking about Apple TV. The streaming platform is one of the best in the streaming industry. The “Squared Apple” can offer you the top channels in the world with just a push of the remote button.
From Netflix and Hulu to BBC iPlayer, all can be accessed on your screens if you’re operating on this device. As we said before, streaming requires a decent internet connection to satisfy your needs. If your connection takes a small setback, your Saturday night can be ruined just like that. That’s why much like all the devices in this article, Apple TV is also susceptible to DNS change. Once you go through this process, you’ll be streaming your favorite channels without those internet hiccups we all hate.
Why Alter your DNS Settings?
Changing your DNS server may benefit you in several ways. First is your internet speed. The server you might be using might undergo some conflicts. As a result, your connection speed will be affected drastically resulting in latencies and buffering issues. However, if you change your server, you’ll benefit from better ones with low peak times. Who knows, you might end up using a server that’s not overloaded by other internet users.
Another benefit of changing your DNS using a Smart DNS service is that you get to access channels only available in a certain country. Ever tried to access Hulu on Apple TV while outside the United States? Well, if you did, then you know that the service blocks your access upon attempt. With a Smart DNS service, you can change your current whereabouts and appear to be in a different region. This way, you’ll have access to channels like Hulu, BBC iPlayer, and so many more despite being physically overseas.
You can use the following providers that also support Smart DNS. With these, you’ll be able to protect your data by using their VPN features or simply bypass regional restrictions and access channels all over the world.
Here’s an overview of the best VPNs you can use on any of your devices. ExpressVPN offers a Smart DNS feature that enables you to access geo-restricted content.


- Best for streaming and privacy
- High speed servers in 160 VPN locations
- Works for Netflix, BBC iPlayer, Amazon Prime Video, and Hulu
- 24/7/ live chat support
- 3 extra months free on annual plan


- UltraHD streaming
- Free Smart DNS proxy
- Unblocks all major streaming services
- Limited Time 72% Discount


- Unlimited VPN connections
- Over 1000 servers
- Ad-blocking feature available

- User-friendly application
- Exclusive Smart VPN feature
- Standalone Smart DNS subscription available
- Extra security features
- Extensions for Firefox and Chrome
- Split-tunneling available
How to Switch DNS Servers on Any Device – Summing Up
Changing DNS settings has become pretty essentials for internet users. If you’re fed up with your ISP’s slow server, you now have an alternative on each and every device you might be operating. Don’t stick to the limitations that were enforced on you by default. Think outside of the box and change your DNS. This way you’ll enjoy a better internet experience no matter what platform your using. I hope that this guide was helpful.
Related Posts


About The Author
Charles
Streaming gadgets geek. Interested in every little thing there is to know about bypassing regional restrictions. An avid believer in the right to protect online privacy. Charles has also reviewed plenty of VPN service providers and knows how to separate the good apples from the bad ones.
