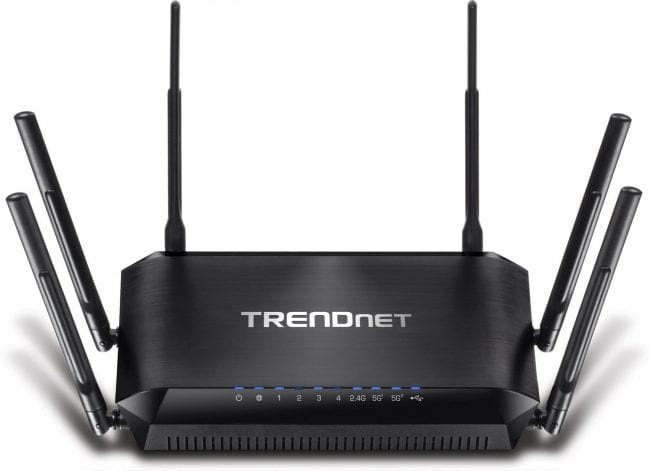
How to Install a VPN on Your TRENDnet Router
VPNs are a very popular cybersecurity tool that can also give you access to geoblocked websites. Most VPN users strategically use their account to protect their smartphones and computers while using the internet. There is, however, a way to extend a VPN’s protection to all of you IoT devices without using up your allotted connection limits. Read this guide to learn how to install a VPN on your TRENDnet router for wider internet protection.

How to Install VPN on a TRENDnet Router
Why Setup a VPN on your TRENDnet Router
Let me start this by defining what a VPN is.
VPN is short for Virtual Private Network. It is a cybersecurity tool that re-routers your traffic, encrypts your data, and spoofs your IP. A VPN will use its own server lists to re-route your traffic, effectively passing it through a secure and impenetrable tunnel. This means that all of your traffic becomes impossible to monitor by third-parties, including your own ISP.
Another perk of having a VPN is the ability to bypass regional restrictions. When you connect to a VPN server, your public IP automatically changes to match that servers location. Geo-restrictions are activated when an IP from a blocked region attempts to access a website. Changing your IP to that of a non-blocked region removes the geoblock.
Now, the benefits of installing your VPN on your TRENDnet router have to do with amplifying the VPN’s effect. In other words, once your router has a VPN installed on it, it’s able to protect all of the connected devices and give them the ability to access geoblocked websites. A VPN on your TRENDnet router will cover your smartphones, computers, tablets, Smart TVs (of all brands), gaming consoles, and any other device that has the ability to connect to the internet.
Best VPN for Your TRENDnet Router
We suggest using ExpressVPN on your TRENDnet Routers. ExpressVPN supports OpenVPN and L2TP/IPsec protocols, among others, which make it highly configurable. You can read a more detailed description of the best VPN providers for TRENDnet routers here.
I’ll be using ExpressVPN to show how you can install a VPN on a TRENDnet router throughout this guide. The steps below will still apply even if you’re not using ExpressVPN, the only difference might be the interface of your router’s control panel.
Be sure to check your VPN provider’s support pages and FAQ for any specific installation guides that they might have.
How to Install VPN on Your TRENDnet Router – Step by Step Guide
Installing a VPN on your TRENDnet router will usually involve two steps. The first, flashing your router, is the process of changing the operating system of the router into one that is VPN ready. This step can be bypassed if your router’s manual states that it is VPN ready. If not, please check this list of DD-WRT supported devices. If your TRENDnet router’s model is on this list, then you can proceed with this installation guide.
First Step – Flash the Router with DD-WRT
If you’ve found your TRENDnet router’s make on the list I mentioned above, you can safely flash your router with DD-WRT.
Flashing your router involves manually changing the router’s firmware. The reason we suggest flashing the TRENDnet router with DD-WRT because of its highly configurable traits.
WARNING: Flashing your router is a highly technical process. The actual technical work isn’t confusing, but you do need to be very careful when choosing the firmware you’re going to flash your router with. Follow this guide on how to flash your router with DD-WRT to a T, and make sure that you’ve done all of the appropriate research.
Second Step – Install the VPN Client on Your TRENDnet Router
After flashing your TRENDnet router with DD-WRT, you can now install a VPN client onto your VPN ready router. As I mentioned above, I will be using ExperssVPN to explain this step.
- log into ExpressVPN and go to Setup ExpressVPN.
- Click on Manual Config and then on OpenVPN.
- Download the .ovpn file.
- Go to your TRENDnet Router’s configuration page by typing in your router’s IP into a browser address bar. You’ll find the IP on the back of the router with the rest of the router information.
- Go to Services and click on VPN.
- Enable Start OpenVPN. Now, you’ll have to fill in a few fields.
- Open the .ovpn file in Notepad.
- Locate the word Remote. You’ll see an address line followed by 4 numbers. It’ll look something like this: xxxxx.copythisaddress.com XXXX.
- Copy the address and insert it in the ServerIP/Name field.
- Copy the 4 numbers you found next to the address and past them in the Port field.
- In Notepad, search for the <tls-auth> and </tls-auth> tags. Copy the text in between those tags. Start from “BEGIN OpenVPN Static Key” and stop after “END OpenVPN Static Key“.
- Paste the text in the TLS Auth Key field.
- Repeat the process in step 11 but look for the <cert> and </cert> tags.
- Paste the text into the Public Client Cert field.
- Repeat the process in step 11 but look for the <ca> and </ca> tags instead.
- Paste the text into the Ca Cert field.
- Repreat the process in step 11 but look for the <key> and </key> tags.
- Paste the text into the Private Client Key field.
- Click Save and then Apply Settings.
- Go to the status tab. You should see “Client: CONNECTED STATUS.”
And that’s all it takes to install a VPN client on your flashed TRENDnet router.


