How to Install Kodi on Raspberry Pi via OSMC
I got myself a Raspberry Pi because I like to tinker with technology. Don’t let its size fool you. This 30-gram device can do a lot. Did you know that you can turn it into an outstanding media center? Yeah, it’s manageable if Kodi is installed. I know, I know, it can be quite daunting since Pi is quite techy and all, but it’s doable if you know your way around it. Well, that’s why I’m here. This guide will show you how to install Kodi on Raspberry Pi using OSMC.
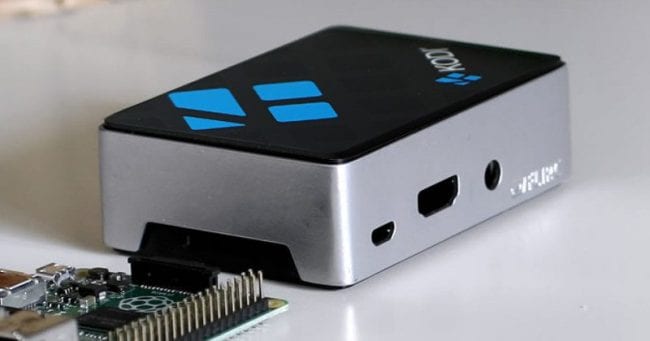
How to Install Kodi on Raspberry Pi via OSMC
Content Index
Did you know that you can install Kodi on your Raspberry Pi? Well, it’s not very simple, but it can be done if you follow a few steps. Let’s take a look at how to install Kodi on Raspberry Pi via OSMC.
Basic Requirements
You need a couple of stuff before you can head over to the installation part. Get the following in the list below and let’s move on:
- Raspberry Pi (obviously).
- Power Source for Pi.
- An SD card.
- A keyboard and mouse (Either via USB or Bluetooth)
- HDMI Cable
Should I use OSMC or OpenLec on my Raspberry Pi?
Which operating system you choose for your Pi is totally up to you. It’s a matter of preference. The installer feature on OSMC makes it easier to set everything up. On the other hand, OpenLec depends on image writing software. In either case, both OSMC and OpenLec are free to download and install. Just in case you want to try out installing Kodi on Raspberry Pi via OpenLec, check this guide out.
How to Install Kodi 17 on Raspberry Pi via OSMC
- Insert an SD card into your PC’s or Mac’s SD card reader.
- Now download the OSMC installer from the official OSMC website.
- Choose the operating system of your computer.
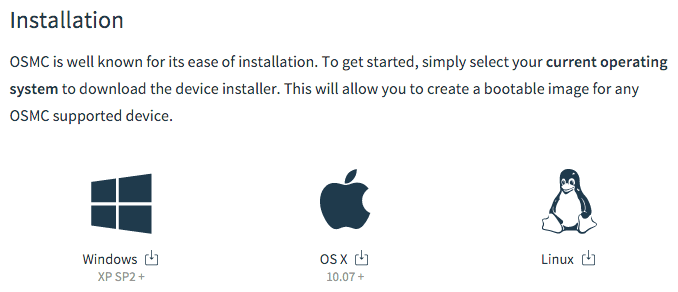
How to Install OSMC on Raspberry Pi?
- Next, install and run the OSMC installer you have just downloaded.
- Now you need to install OSMC on your SD card.
- Open up the OSMC installer
- Select your language
- Choose the type of device you’re setting up.
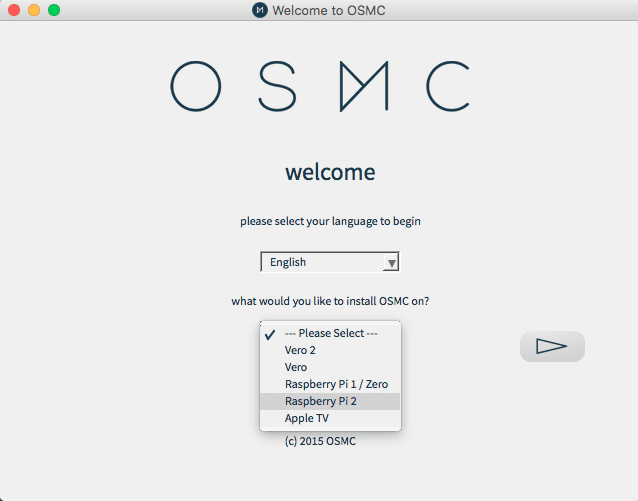
- On the next screen, it’ll ask you where you would like to install OSMC. Choose the ‘SD Card.’
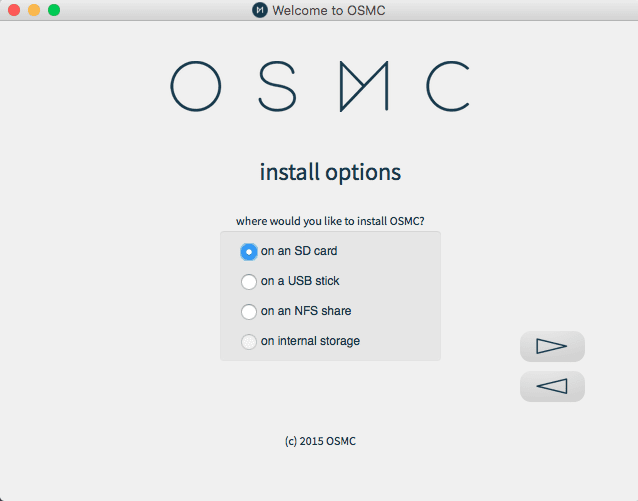
- Finish the setup process and then take out the SD card and plug it in your Raspberry device.
- When you launch the Pi, OSMC will set up automatically.
- Finally, enjoy Kodi on Raspberry Pi!
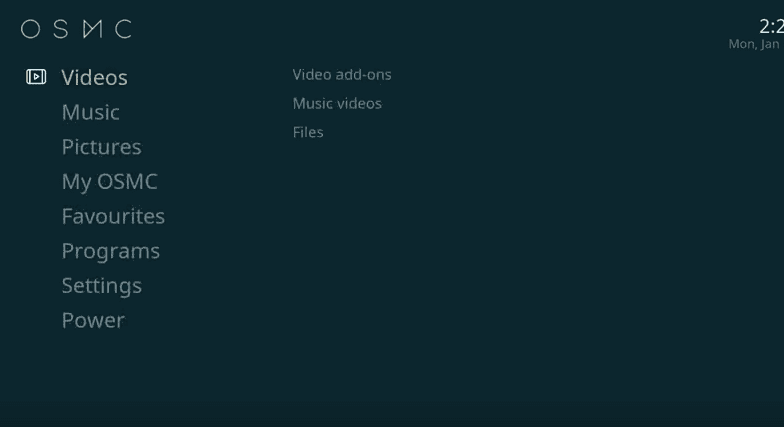
Get Kodi Video Addons on OSMC
Alright, so you’ve managed to install the OSMC on the device. But you’re far from done. Kodi is useless unless you know how to install add-ons. Shall I teach you how to do so? Here we go:
- While using OSMC, go to Add-ons.
- After that, you’ll find an Open Box Icon on the top left of your screen.
- Click on that, and you’ll be redirected to the next page.
- Now, hit Install from Repository followed by Kodi Add-on Repository and then Video Add-ons.
- Search for the add-on you want to get and hit the Install button.
- An Add-on Enabled Notification will pop up.
- After that, navigate back to the main screen and click on the Add-on section again.
- Do you see Video Add-ons? Tap on that.
- Finally, select the video add-ons you installed and enjoy.
Stay Safe – USE VPN with OSMC
Raspberry Pis are an excellent device for those who like to tamper with technology and learn more. Well, it was designed for educational purposes, to begin with. However, being as small as it is doesn’t omit the fact that online threats will target it. Whenever you access the internet, you should take proper precautions first. The best way to secure your information is by using a VPN.
A VPN for a Better Kodi Experience
Kodi has a reputation, not a good one if you’re asking. There are hundreds of add-ons, some official, while the others are not. Let me explain it more. Not official means not legal. If you’re trying to use add-ons that offer TV shows for free, you’re violating copyright laws. In some countries, that doesn’t go by, just like that. It is and will always be considered a crime. With a VPN, you get to hide your IP address and browse the internet anonymously. You can even use such add-ons without compromising your identity. (I’m not encouraging you to do so. You should always avoid illegal add-ons.)
One other thing a VPN is good at is the ability to bypass regional restrictions. You see, a lot of Kodi-addons are region-restricted, which means they’re only available in certain countries. However, if you use a VPN, you get to circumvent these geo-issues and access whatever you want on Kodi. Just connect to a server in the country where the add-ons are available, and voila, you’re good to go.
Furthermore, with Kodi, you get to stream the best channels around the world. But what if your connection took a sudden drop? No, no, it’s not you nor your connection, your ISP might be tampering with it. That’s what I call ISP Throttling. To avoid that, connect to a VPN server and your problem is solved.
In my opinion, ExpressVPN stands on top of the VPN industry. It’s not just empty words; the VPN can back it up. You can connect to more than 2500 servers across 94 countries. Also, the VPN keeps no logs and has a kill switch feature in case a sudden drop in your VPN connection occurs. That way, whatever you were doing while connected remains safe and private. You can also check other top VPNs for Kodi if you want to pick an alternative.
Last Updated Today

- 30-Day Money-back Guarantee
- Unlimited Bandwidth
- Apps For All Your Devices
- 24/7 Live Support
How to Install VPN on Raspberry Pi via OSMC
You can install a VPN addon to your Kodi on OSMC by following the steps below.
- Launch OSMC and then go to Settings -> System Info -> and note down your IP address.
- Launch Putty and input the IP address you have noted down previously under ‘Host Name.’
- Use Username: OSMC and Password: “osmc”.
- Input the following command: On your computer, download and install Putty. wget https://github.com/Zomboided/repository.zomboided.plugins/releases/download/1.0.0/repository.zomboided.plugins-1.0.0.zip
- This will allow you to download the Zomboided VPN Manager.
- Once the process is completed, jump back to your Raspberry Pi.
- Go to Settings -> Add-on browser -> My Add-ons.
- Choose Install from Zip file.
- Select Zomboided Repository -> Services -> VPN Manager for OpenVPN.
- Once the installation is finished,
- After that, an Add-on enabled notification will appear.
- Installation complete. Select Configure.
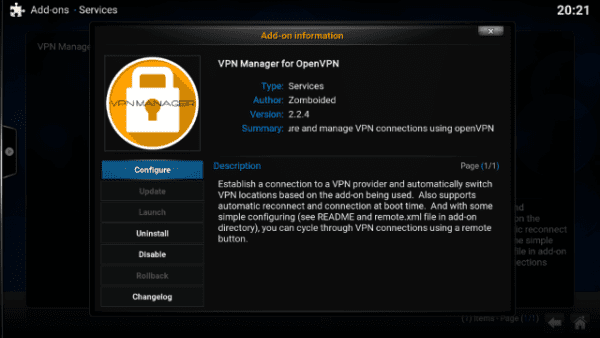
- You’ll be asked to set up a VPN connection. All you need to do is tap the OK button.
- A Configuration window will appear with options for your VPN Provider. Choose yours, of course.
- Sign in with your VPN credentials.
- Head over to First VPN Connection. You can get there by clicking on VPN Connections.
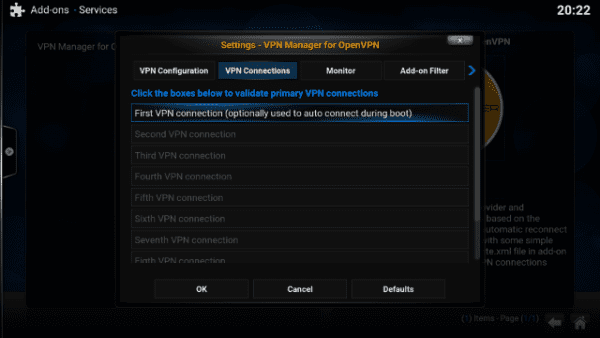
- The connection establishing process will begin. Once it goes well, you’ll be able to tap into a list of servers to choose from different locations.
- Choose a VPN server according to what you’re looking for. If it’s just security, select any server that’s closest to you for better speeds. If it’s a specific channel, connect to a server in its country.
- When the connection takes place, the manager will show you everything about your connection in terms of your new IP address and server.
How to Install Kodi on Raspberry Pi via OSMC
See? It’s effortless. You just need the proper guide to it, and you’re all good. Now that you know how to get Kodi on Raspberry Pi, which add-ons are you willing to install? Did you try using a VPN to unlock more content? Share your thoughts in the comments below.


You did not answer Brian’s last question.
When you say “Addons”, do you mean “Addons Browser”? I do not have an “Package Installer Icon” anywhere I can find.
ripstangl
I have installed Exodus as noted above but I cannot locate the app. Should it be under programs?
thanks
Is there anyway to connect wifi into my raspberry pi? I can’t exit kodi as it has a kodi autoloader. Anyone know how to remove this?
I am really confused. I downloaded the latest OSMC and yet everything keeps calling it KODI. Are the two the same? I followed all the instructions for installing Fusion. What happens after step 8? When you say “Addons”, do you mean “Addons Browser”? I do not have an “Package Installer Icon” anywhere I can find.
Hello Brian. OSMC is the operating system that runs Kodi and brings it to your Raspberry Pi. OSMC is not a fork of Kodi but rather a Linux distribution that ships Kodi as the main application.